You can change Blend Modes
and opacity of the layer, according to
your colors.
*****
Install the filters in your PSP Plugins folder.
Open and minimize your Mask in PSP
Save your work often in case of problems with your psp.
*****
This tutorial was translated with Corel X18,
but it can also be made using other
versions of PSP.
The results might be slightly different according to the version of
PSP you use.
For versions higher than PspX5 (image reflect / image flip) go to
this page

Step 1
Open a new transparent
image 900x600 pixels
Set your foreground color with color #a95f2d or a color of your choice
Flood Fill the transparent image with the Foreground color or other of your
choice.
(For my version I chose #797f31)
Layers/New raster layer and flood fill with white.
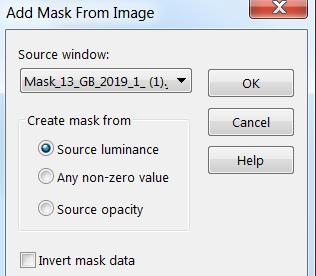
Open the Mask 13 GB in psp,
Layer/new mask layer from image
Effects/Edge effects/ Enhance
Layers /Merge/Merge Group
Step 2
Select Raster 1
Edit/ Open one of your misted landscape
Go back to your work: Edit / Paste as a new layer
With the Pick tool ("K" key), Stretch it so that it fills the entire level.
(If it is too small, duplicate it, mirror it and then merge/merge down)
Effects/Plugins/Apply the User defined filter: Emboss 3:

Key "M" for deselect
the Pick Tool
Step 3
Activate the layer Group-Raster2
Activate your selection Tool / Rectangle and select the interior as follows:

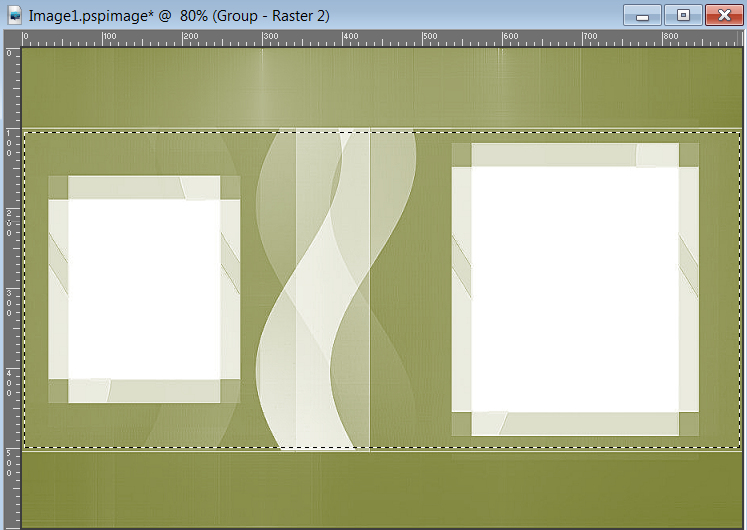
Selections / invert
and press Erase key
Selections / Select None
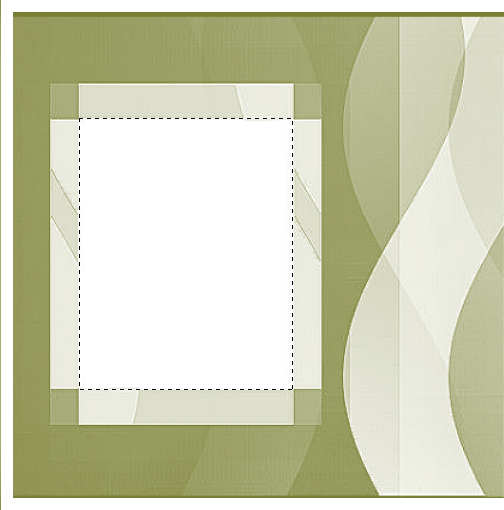
Selections/Create a custom selection with these settings:
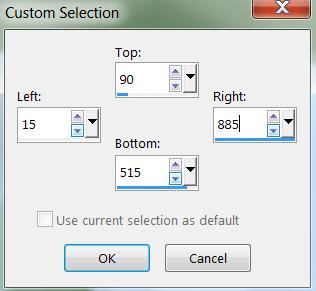
Step
4
Layers/New raster layer
Flood fill with white color.
Selections/Modify/Contract 10px.
Press erase key.
Effects/3D effects / Drop shadow
0-0-100-80 color white
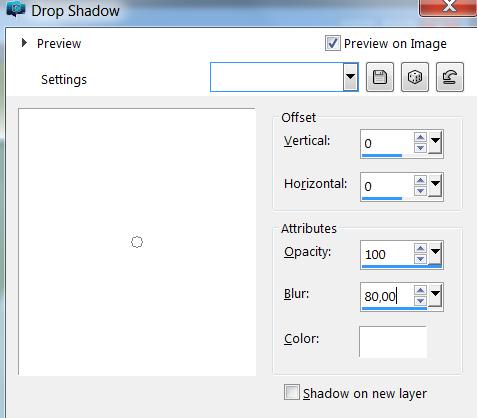
Selections, Select
none
Activate the layer Group-Raster2
and with the
Pick tool (key K)
Place it well inside the white frame.
(the mask must touch the edges of the frame)
Key "M" for deselect the Pick Tool
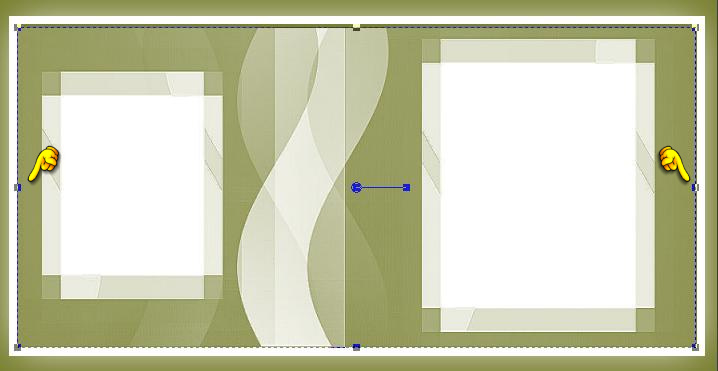
Step 5
Stay on the Group-Raster2 (mask)
Activate the Selection Tool / Rectangle (same settings as above)
Make a selection in the first box as follows:
Layers
/ New raster layer
Edit / Copy a misted landscape of your choice
Go back to your work: Edit / Paste into selection
Layers / New raster layer,
Flood fill with a color of your choice
Selections / Modify / contract 5px,
press the delete key.
Selections / Select none
With the magic wand (mode Add-Shift RGB value, Tolerance 0, Feather 0) select
the frame
Effects / 3D effects / Inner bevel / as follows:
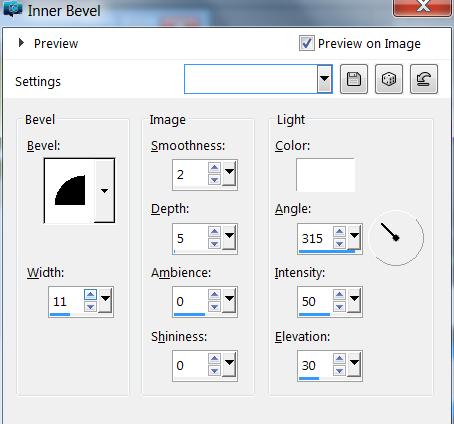
Selections, Select
none
- Select Group Raster2 (mask)
Do the same job with the other box
Step 6
Image /Add border symetric 20 px color white
Selections / Select All,
Selections / Modify / Contract 20px /
Selections / invert
Effects / Plugins / Unlimited 2.0 /Alf’s border Fx Mirror bevel /default
Selections / Select
none
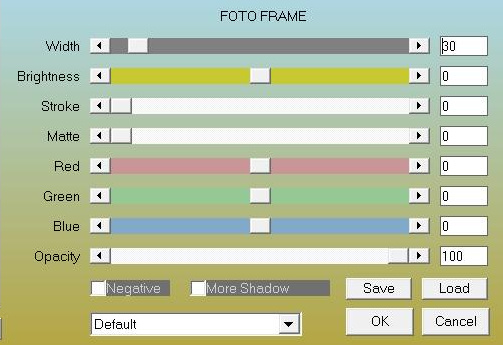
Image / Add border symmetric/ 30 px / light color
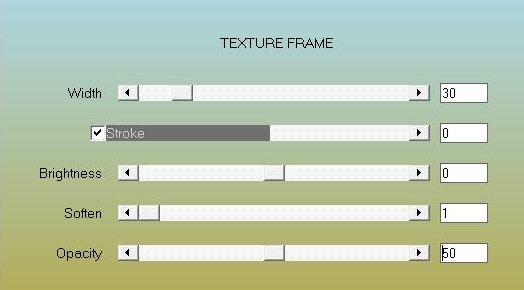
Effects / Plugins / AAA Frames / Photo frame (changing only width to 30)
Selections / Select All,
Selections / Modify / Contract 30px,
Selections / Invert
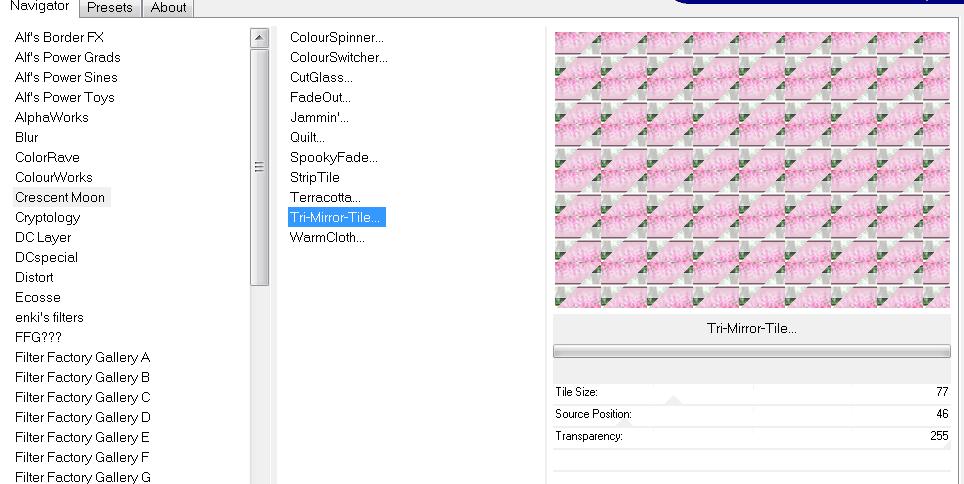
Effects / Plugins / Unlimited 2.0 /Crescent moon / Tri-mirror-Tile as follows:
Adjust / blur /
Gaussian blur Radius 10
Effects/Plugins/ AAA Filter/ Texture frame
If you don't like the
color change it with:
Adjust / Hue and Saturation /Colorize
Selections / Invert
Effects / 3d Effects / Drop Shadow as before BUT with black color.
Selections / Select none
Step 7
Edit / Copy (your tube)
Go back to your work: Edit / Paste as a new layer
Layers / Duplicate.
Select the level of the original tube
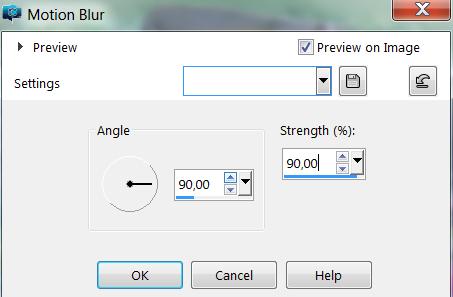
Adjust / blur / motion blur
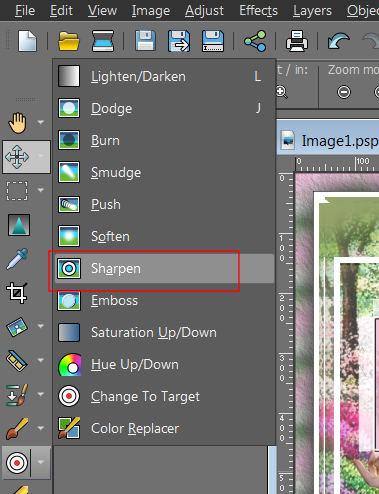
Now if you want, with
the Sharpen tool focus, highlight what you want
Add if you want some
ornaments,
Layers / new layer
Add your signature or watermark
Merge / Merge All (Flatten)
File / Export / JPEG optimization
***
I hope you have enjoyed this tutorial
*****

MY BLOG TRANSLATION

Mina@
tubes
Mina@
tubes femminili
RITORNA ALLA PAGINA DEL BLOG